Introduction to No-Bake Pie
What is a no-bake pie?
A no-bake pie is exactly what it sounds like — a delicious pie that requires no oven time at all. Instead of baking, these pies set in the refrigerator, creating a cool, creamy dessert that’s as easy to make as it is satisfying to eat. No-bake pies often feature simple crusts made from crushed cookies or graham crackers and luscious fillings using ingredients like cream cheese, whipped topping, pudding, or fresh fruit. They’re the perfect solution when you want a decadent treat without the hassle of baking.
Why people love no-bake desserts
People adore no-bake desserts for so many reasons. First, they save time and keep the kitchen cool, which is especially important during warm weather. They’re also incredibly simple and beginner-friendly — no worrying about oven temperatures or overbaking. Best of all, no-bake pies offer endless possibilities for creativity with different crusts, fillings, and toppings. Whether you’re preparing for a party, a family dinner, or just craving something sweet, a no-bake pie is a stress-free way to enjoy a crowd-pleasing dessert.
Benefits of Making a No-Bake Pie
No oven required
One of the biggest perks of making a no-bake pie is that you don’t need to turn on the oven at all. This makes it accessible for anyone, even if you don’t have a fully equipped kitchen. Plus, it’s a fantastic option when you want to keep your kitchen cool and comfortable.
Quick preparation
No-bake pies come together in a fraction of the time it takes to bake a traditional pie. Most recipes involve just a few simple steps: prepare the crust, mix the filling, assemble, and chill. This makes them perfect for busy days or last-minute dessert needs.
Perfect for summer and gatherings
When the weather is warm, a chilled no-bake pie is a refreshing, light treat that everyone enjoys. They’re also easy to make ahead of time, making them a go-to dessert for potlucks, parties, or holiday gatherings. With their beautiful presentation and delicious flavors, no-bake pies are guaranteed to impress.
Choosing the Perfect Crust
Graham cracker crust
A graham cracker crust is a classic choice for no-bake pies. It’s lightly sweet, buttery, and has a subtle flavor that pairs beautifully with almost any filling, from fruity to creamy. Plus, it’s easy to make — just combine crushed graham crackers with melted butter and a bit of sugar.
Oreo or chocolate crust
For chocolate lovers, an Oreo or chocolate cookie crust adds a rich, decadent base to your pie. This crust works especially well with chocolate, peanut butter, or cheesecake-inspired fillings. Simply crush the cookies, mix with melted butter, and press into your pan for an irresistibly chocolatey start.
Nut-based crust options
Looking for something a bit different? A nut-based crust can add a unique flavor and texture to your no-bake pie. Crushed nuts like pecans, almonds, or walnuts can be mixed with a bit of sweetener and butter to form a sturdy, flavorful crust. These are great for adding a slightly savory, crunchy element that complements creamy fillings perfectly.
Essential Ingredients for No-Bake Pies
Creamy fillings (cream cheese, whipped toppings)
Creamy fillings are the heart of many no-bake pies. Ingredients like cream cheese, whipped topping (such as Cool Whip), and heavy cream create a smooth, fluffy texture that holds its shape beautifully once chilled. These bases can be flavored with vanilla extract, citrus zest, or sweetened condensed milk for extra richness and depth.
Fruit fillings
Fruit fillings add a fresh, vibrant touch to no-bake pies. You can use fresh or frozen fruit, fruit preserves, or canned pie fillings, depending on the season and your preferences. Berries, peaches, and tropical fruits like pineapple or mango work especially well, adding natural sweetness and bright color to every slice.
Chocolate and caramel options
For a more decadent twist, chocolate and caramel fillings are always a hit. Melted chocolate or chocolate pudding can be folded into cream cheese or whipped cream bases for a rich, mousse-like texture. Swirls of caramel sauce or layers of dulce de leche create a luxurious, indulgent pie that’s perfect for special occasions or satisfying serious sweet cravings.
Tools and Equipment You’ll Need
Mixing bowls
Having a few sturdy mixing bowls on hand is essential. You’ll need them for crushing crust ingredients, whipping cream, and mixing fillings. Different sizes make it easier to stay organized and keep layers separate.
Hand mixer or whisk
A hand mixer is especially helpful for quickly whipping cream or cream cheese into a light, airy texture. If you don’t have a mixer, a whisk can work — it just requires a bit more effort to achieve the same fluffy results.
Pie pan and spatula
A standard pie pan (usually 9 inches) is perfect for assembling your no-bake pie. A spatula helps you spread layers evenly and smooth out the top for a beautiful, professional finish. Using a springform pan is also an option if you want to easily remove and showcase the pie’s sides.
Step-by-Step Classic No-Bake Pie Recipe
Ingredients list
For the crust:
- 1 1/2 cups graham cracker crumbs (or crushed cookies)
- 1/3 cup granulated sugar
- 6 tablespoons unsalted butter, melted
For the filling:
- 8 oz cream cheese, softened
- 1/2 cup granulated sugar
- 1 teaspoon vanilla extract
- 1 container (8 oz) whipped topping (like Cool Whip)
Optional toppings:
- Fresh fruit
- Chocolate shavings
- Caramel drizzle
Detailed instructions
- Prepare the crust
- In a bowl, combine graham cracker crumbs, sugar, and melted butter until the mixture resembles wet sand.
- Press the mixture firmly into the bottom and slightly up the sides of a 9-inch pie pan.
- Place the crust in the refrigerator to chill while you prepare the filling.
- Make the filling
- In a large mixing bowl, beat the softened cream cheese and sugar until smooth and creamy.
- Add the vanilla extract and mix until fully combined.
- Gently fold in the whipped topping until no streaks remain.
- Assemble the pie
- Spoon the cream cheese mixture into the chilled crust and smooth the top with a spatula.
- Cover and refrigerate for at least 4 hours, or until set.
- Add toppings
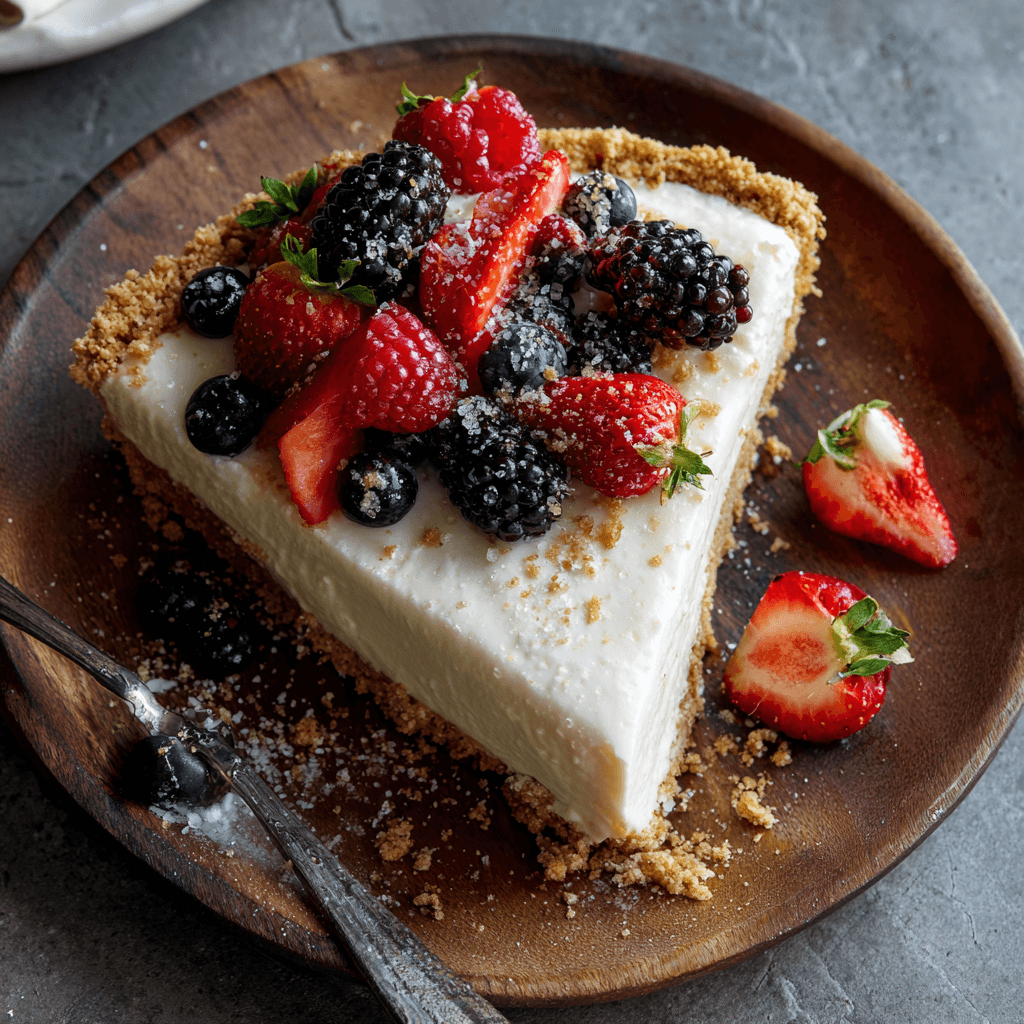
- Just before serving, top the pie with fresh fruit, chocolate shavings, or a drizzle of caramel for extra flavor and a beautiful presentation.
Pro tips for smooth, sturdy pies
- Make sure your cream cheese is fully softened to avoid lumps in the filling.
- Chill each component as needed to help the pie set properly.
- For extra stability, add a tablespoon of lemon juice or a few tablespoons of powdered sugar to the filling to help it firm up.
- Use a sharp knife dipped in warm water to slice cleanly through the chilled pie.
Creative No-Bake Pie Flavor Ideas
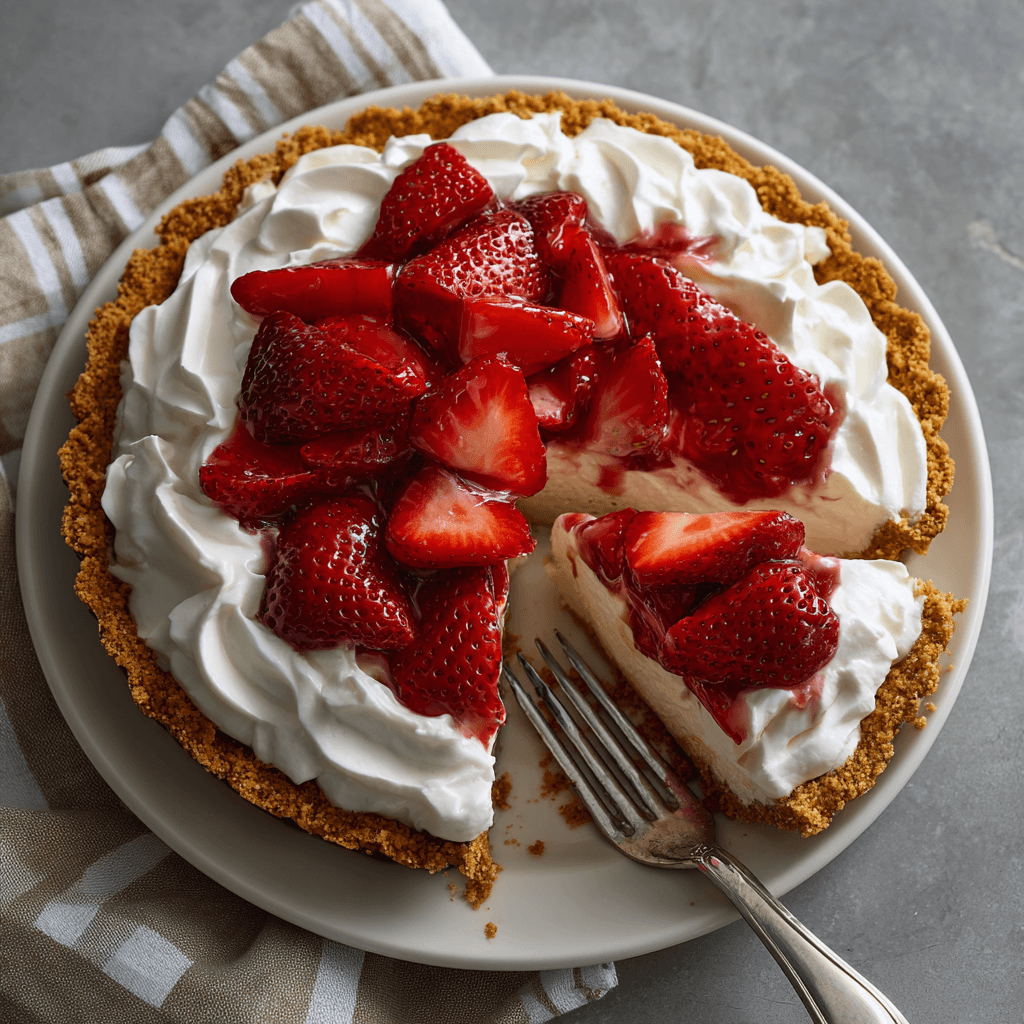
Strawberry cream pie
Combine fresh or frozen strawberries with a creamy filling for a light, fruity dessert. Top with extra berries and a dollop of whipped cream for a summery finish.
Chocolate peanut butter pie
Mix cream cheese with peanut butter and fold in whipped topping for a rich, decadent treat. Top with crushed peanuts and chocolate sauce for extra indulgence.
Lemon icebox pie
Blend sweetened condensed milk with lemon juice and zest for a refreshing, tangy pie. A graham cracker crust and a light whipped topping make this a zesty, classic favorite.
Tropical coconut-lime pie
Mix coconut cream or cream cheese with lime juice and zest for a tropical-inspired dessert. Garnish with toasted coconut flakes and lime slices for a vibrant, vacation-like vibe.
Tips for Achieving the Perfect Set and Texture
Chill time
One of the most important steps for a successful no-bake pie is giving it enough time to chill. Most pies need at least 4 hours, but overnight is even better for a firm, sliceable texture. A well-chilled pie not only holds its shape but also develops deeper, more balanced flavors.
Filling thickness
Be careful not to make your filling too thin or too loose. Use ingredients that naturally thicken as they chill, like cream cheese, whipped topping, or sweetened condensed milk. If your filling feels too runny before chilling, consider folding in extra whipped topping or chilling the mixture for 30 minutes before assembling.
Proper crust preparation
A strong, well-packed crust acts as the foundation for your pie. Press the crust mixture firmly into the pan using the bottom of a glass or measuring cup to create an even, compact base. Chill the crust for at least 15–20 minutes before adding the filling to help it stay firm and prevent crumbling when slicing.
Common Mistakes to Avoid
Overmixing fillings
While it’s important to mix until smooth, overmixing can cause your filling to deflate, especially when folding in whipped topping. Gently fold ingredients together just until combined to maintain a light, airy texture.
Rushing the chill time
It can be tempting to cut into your pie early, but rushing the chill time will result in a runny, unstable dessert. Patience is key! Always allow enough time for each layer to set properly to achieve those beautiful, clean slices.
Using too much liquid
Adding extra lemon juice, fruit puree, or other liquids can thin out the filling too much, making it difficult for the pie to set. Always follow measurements carefully and avoid adding more liquid than specified. If you want extra flavor, use zest or concentrated extracts instead of juice.
Storing and Serving No-Bake Pies
How to store in the fridge or freezer
Store your no-bake pie in the refrigerator, covered with plastic wrap or in an airtight container, for up to 4–5 days. This keeps it fresh and maintains its creamy texture.
If you’d like to store it longer, most no-bake pies can be frozen. Wrap the pie (or individual slices) tightly in plastic wrap and then foil to prevent freezer burn. Freeze for up to 1 month, and thaw in the fridge overnight before serving.
Make-ahead tips
No-bake pies are excellent make-ahead desserts. You can prepare the pie a day or two before an event, allowing it plenty of time to set. For the best presentation, add any fresh fruit or delicate toppings just before serving to keep them looking vibrant and fresh.
Decorating and garnishing ideas
A beautifully garnished pie can elevate the entire dessert table. Try these ideas:
- Fresh fruit slices or whole berries
- Shaved chocolate or chocolate curls
- Whipped cream rosettes
- Citrus zest for a bright pop of color
- Toasted nuts or coconut flakes for added texture
Pairing Ideas for No-Bake Pie
Beverages and dessert pairings
Pair your no-bake pie with beverages that complement its creamy, sweet flavors:
- Coffee or espresso — the slight bitterness balances the sweetness.
- Iced tea or lemonade — refreshing options, especially with fruit-based pies.
- Sparkling wine or dessert wine — for a celebratory touch.
For a full dessert spread, consider adding:
- Fruit platters — light and refreshing.
- Mini tarts or cookies — bite-sized treats that offer variety.
- Chocolate truffles — rich and indulgent, perfect with creamy pie slices.
Great side treats for parties
Make your dessert table unforgettable by including side treats like:
- Chocolate-dipped strawberries
- Bite-sized cheesecake squares
- Small cups of mousse or pudding
- Assorted nuts and sweet snack mixes
These pairings and side treats will create a well-rounded, impressive dessert experience that guests will love.
Adjusting for Special Diets
Gluten-free crust options
If you need a gluten-free version, there are many easy swaps for the crust. Use gluten-free graham crackers or cookies, which are widely available in most grocery stores. Simply crush them and mix with butter just as you would with a traditional crust. You can also try a nut-based crust using ground almonds or pecans for a naturally gluten-free, flavorful base.
Dairy-free and vegan variations
Creating a dairy-free or vegan no-bake pie is easier than you might think. Use vegan cream cheese and dairy-free whipped topping (such as coconut-based or almond-based versions). For the crust, use plant-based butter or coconut oil. These swaps keep the pie creamy and delicious while making it suitable for those avoiding dairy.
Low-sugar swaps
If you’re watching your sugar intake, you can reduce the sweetness without sacrificing flavor. Use a sugar substitute like stevia, erythritol, or monk fruit sweetener in place of regular sugar. Choose sugar-free cookie options for the crust and opt for unsweetened whipped topping. Fresh fruit can also add natural sweetness without extra sugar.
Frequently Asked Questions About No-Bake Pie
How long does it last?
When stored properly in the refrigerator, a no-bake pie will stay fresh for 4–5 days. Be sure to cover it tightly to keep the filling smooth and the crust crisp.
Can I freeze it?
Yes! Most no-bake pies freeze well. Wrap the pie or individual slices securely in plastic wrap and aluminum foil to prevent freezer burn. It can be frozen for up to 1 month. Thaw overnight in the fridge before serving for the best texture.
What if my pie doesn’t set?
If your pie doesn’t set, it could be due to too much liquid in the filling or not enough chilling time. Check that you measured ingredients precisely and allowed it to chill for at least 4 hours (preferably overnight). If it’s still too soft, you can try freezing it briefly before serving to help firm it up.
If you’re inspired to try even more no-bake treats after making this pie, check out the indulgent No-Bake Chocolate Cherry Lush for another layered, creamy option. Love easy cookies? You’ll enjoy these classic Peanut Butter No-Bake Cookies or the irresistible Chocolate Peanut Butter No-Bake Cookies. For chocolate lovers, pair your pie with some rich Double Chocolate Chip Cookies or fudgy Easy Saucepan Brownies. If you’re building a dessert spread, consider adding a fun Ice Cream Cake or a bright, zesty Lemon Pound Cake to round out your sweet table beautifully.
For even more delicious ideas, check out this amazing collection of no-bake desserts from Taste of Home.
Conclusion: The Stress-Free Way to Impress with No-Bake Pie
No-bake pies truly are the perfect combination of simplicity and elegance. With their creamy textures, endless flavor options, and easy, oven-free preparation, they offer a stress-free way to create a dessert that looks and tastes impressive.
Whether you choose a classic creamy filling, a fresh fruit layer, or a rich chocolate twist, there’s a no-bake pie to match every craving and occasion. Don’t be afraid to experiment with different crusts, mix-ins, and toppings to make each creation uniquely yours.
So go ahead — gather your ingredients, get creative in the kitchen, and enjoy the sweet satisfaction of serving a beautiful no-bake pie that everyone will love. Happy layering!


